First, let's address some definitions.
Astrophotography, generally refers to photographs taken through a telescope of one sort or another, ranging from local heavenly bodies such as planets, asteroids or comets, to distant quasars, nebulae and galaxies. At minimum this requires a high-end camera and a telescope.
Astrolandscape photography (often referred to as night sky photography) is just what it sounds like, taking landscape photographs under the stars. This is what I like to do, especially here at Acadia where the night skies are some of the clearest on the East coast of the United States. This requires a decent digital camera, a tripod and a way to trigger the camera without vibration for long exposures.
A part of Astrolandscape photography can include Light Painting, where the photographer uses any of a variety of artificial light sources to "paint" the scene with controlled light. This technique is not relegated solely to the night sky, heck I've used it in a darkened studio for product images. It can add a certain amount of drama to an image.
Camera Gear
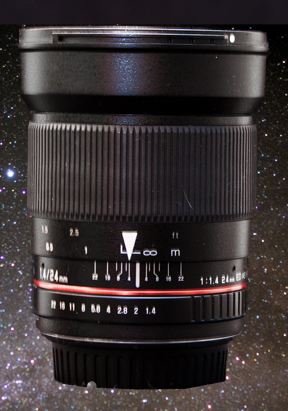
For the beginner, I would recommend a Digital Single Lens Reflex (DSLR) camera or one of the new mirrorless cameras (though the ones I've seen appear to be mighty complicated). The primary goal is to have the versatility of interchangeable lenses and a relatively fast ISO range for the camera. For night sky photography, I recommend a camera as fast as 6400 ISO or greater. For example, my full frame Canon 6D has a max ISO of 102400 which would allow me to take a shot of the Milky Way with the following settings: 24mm lens, fStop 1.4 at 1/4 second. That's fast, but ultimately grainy and noisy (other issues of night sky photography). You would need a wide angle lens that is as fast as possible. . . the lowest fStop should be very low, at minimum a fStop 2.8. I love my Rokinon 24mm f1.4 lens for night sky. This is a manual lens without auto focus, but it's very sharp and fast (and relatively inexpensive). It also makes a dandy daylight landscape lens (much sharper than a zoom).
A sturdy tripod and a remote camera trigger are a must have for shooting at night. The slightest shake will ruin any long exposure photograph.
Flashlight
A flashlight is essential when out shooting under the stars, one that has a red filter cover is best so as not to adversely affect your night vision. But be cautious if around others shooting the night, you could spoil someone's picture. Even the slightest amount of stray light will be recorded by a long exposure photograph.
Focus
Photographing the night sky has its own unique challenges, focusing on the stars has to be the most daunting. The average camera cannot even display stars in the viewfinder or rear display.
The other related problem, is that many lenses do not indicate true infinity on the scale. If, for example you were to take your focus ring all the way to infinity, it will actually go beyond infinity. You read that right. . . beyond infinity (forgive me Steven Hawking), where nothing in the resulting image will be in focus. Maybe it's another dimension. . . who knows? The real reason is too long to explain in a few sentences.
One simple solution is to focus on infinity during the daylight hours by focusing on a spot way off in the distance and then marking the true infinity on the lens. I use white masking tape cut in the shape of a triangle. This makes it easy to set focus for the stars in the dark with a small red flashlight.
None of my lenses display a true infinity setting so the tape is essential.
 |
| |
Speed
Each celestial circumstance a photographer encounters, such as; a full moon, or partially lit moon, an eclipse of the moon, an aurora borealis or the Milky Way, requires their own camera exposure settings based on the camera and lens capabilities. For example I usually shoot the Milky Way with a 24mm lens at fStop 1.4, ISO 1600 for 15sec. If you had a lens that only goes to 2.8 then the setting would be completely different: fStop 2.8, ISO 6400 for 15sec. Notice I had to increase the ISO substantially in order to maintain the 15sec. exposure. Why? I'm glad you asked. The 24mm lens will show star streaking (caused by the Earth's rotation), at anything beyond a 15 second exposure. Thus the only variable left is the higher ISO which will make the end image a bit more grainy and noisy. The longer the lens, the shorter that exposure needs to be to avoid streaking. Naturally, this becomes problematic when using the longer lenses (i.e. 100mm or greater). Oh, and did I mention? The camera sensor size makes a difference too. If you are not using a full frame sensor, then the lens focal length is not necessarily what it says on the lens. . . which changes the situation a bit. Full frame sensors are pricey and not essential to the beginner.
See my quick quide to understanding exposure.
Challenges of shooting at night ( a true story. . . honest ).
For the past few Winters we have had many excellent opportunities to capture a couple of different comets passing the Earth. So, like any crazed Astrolandscape photographer might do, I put on my snowshoes and hiked the North Ridge up to Cadillac Mountain at Acadia National Park. . . in the dark. . . on snow and large patches of ice flows. . . eight times. Eight cold, treacherous, dark hikes up and down the highest mountain on the eastern U.S. coast, carrying a bunch of camera gear on my aging faulty back. Naturally Mother Nature had other ideas; each and every time, I was greeted at the top of my hike with dense clouds hugging the top of the mountain that were not there when I started my climb. . . every time, that is, except one. In January of 2015 I was able to capture Comet Lovejoy as it rounded the sun. It was all worth it. At least I got some great exercise. |
